Today, we’re talking about how you can make the most of your sample library or sample pack. To talk about this properly, I invited my friend Android Dreaming to write about this.
I met him through his free online music production course, which you can check at Modern Sound Collective, and connected with him after that. However, I’m really excited today to show you these techniques that Jacob wrote about because, wow, I was blown away with them.
Take it from here Jacob and I hope you like it.
————————–
As creators, it is inevitable that we will show up in the studio some days only to feel sluggish and uninspired. In these situations, it is important to create sounds that can serve as a jumping off point to get your creative energy flowing.
If you are already following these six tips to break out of writers’ block, then this post can be helpful to think about how you can further break out of the confines of what is comfortable. One of my favorite ways to expand my comfort zone is to see how I can take sounds from a sample pack and mangle them into something entirely fresh and unrecognizable.
I’ve applied the techniques that I’ll show you today in one of my tracks called Loud in Here:
Here’s what we’ll cover today:
- Why You Should Be Working With Sample Packs
- Creating Pads/Atmospheres From Any Sound
- Creating Unique Textures and FX using Ableton’s Warp Modes
- Creating Unlikely Juxtapositions with ‘Kitchen Sink’ Loops
Let’s dive right in!
Why You Should Be Working With Sample Packs
Working with your sample library is a great course of action for dealing with writers’ block because:
- It prevents you from spending money on new sound packs ;
- If you spend a lot of time focusing on sound design from a synthesis perspective, opening up your workflow to do more sound design via audio manipulation will unlock a set of new techniques and ideas that you can apply to every track.
This is something that I could write about extensively, so today I will go over just a few of my favorite methods for exploring audio and getting the most out of a sample library. I encourage you to try each of these examples and think about what you can do differently:
- How can you alter the processing chain to achieve a certain effect?
- What would happen if you built an effects chain and then altered the source material?
The possibilities are really endless, and by experimenting you will become a stronger and more curious sound designer. Additionally, note that while Ableton and some third party VSTs are used here, it is entirely possible to create these sounds with any DAW and a range of free plugins.
Creating Pads/Atmospheres from Any Sound
For this technique, I like to start with a melodic sound or field recording. I often download melodic samples for a certain idea that never really comes to fruition, and I find this is a great way to repurpose the sounds that captured my imagination at some point.
For this example, I will start with a fairly simple koto loop. I don’t think the individual notes are particularly important, though I would tune the sample to the key of your track (or save the finished sound labeled with the key for future use).

Next, I am going to create a new audio track and copy my loop (so I can save a copy of the original sound for later). I will then group my new track and rename the group “Processed”.
I like to group the track immediately and begin applying processing on the group, so that if I end up adding another layer to the sound, I can place a new track in my group and all the audio processing will be easily applied to the new sound and the old sound.

The first step in transforming a sample into an atmospheric soundscape is to think about how you can make something sound spacious. I recommend starting with some big, washing reverbs or delays – even a simple reverb effect can instantly transform your sound into an ambient texture.
I also like to cut out the low end prior to processing, unless I’m specifically designing a sound that I want to fill the low end, but it takes a bit more effort to process the low end nicely so we’ll skip that for now. After adding a hi-pass filter to my group, I will add Ableton’s Echo (delay) and the Max for Live Convolution Reverb Pro (reverb)

Echo (Delay) can add some really unique textures and gives you the ability to independently control the left and ride side delays if desired. Combined with one of the “Chambers and Large Room” presets on Convolution Reverb Pro, which you can also do with any other reverb like Valhalla VintageVerb or Valhalla Room, you can really start to blur the more transient elements of the sound and get to a washier texture.
At this point, the sound is still a little too bright and recognizable for me, so I am going to manipulate the clip directly.
Reversing a sound is a great way to make it sound more pad-like as the transients get transformed into swelling sounds. Some further pitch shifting and stretching will give us something that starts to sound like a pad.

Now that the base of the sound is complete, I am going to move on to some additional “coloring” effects to add more character to the main sound. This is the part of the chain where you can (and should) get really creative and experimental, but remember that being subtle with your effects will often yield the best results.
Additionally, experiment with LFOs or automation on any effects parameter to draw some more movement out of the sound. Here’s the full chain that I used for this sound.
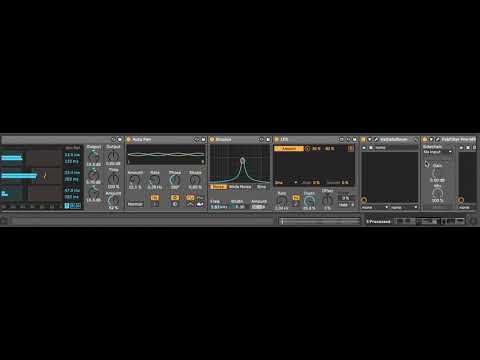
I am using:
- Compression to tame the remaining transients and to glue the sound together a bit;
- Low-pass filter to remove some harsher high tones;
- OTT crushes the sound and adds some grit;
- Auto-Pan (Pancake is an alternative) adds some stereo movement to make the sound a bit more three-dimensional;
- Erosion (Downsampler) adds a bit of noise to further grit up the sound;
- ValhallaRoom (Room Reverb) adds another layer of reverb;
- FabFilter Pro-MB (Multiband Compression) to clean up the sound a little further by taming some resonant peaks in the low-mids;
- EQ to keep the low end clean.
Remember, all of this last stage is applied to taste and done so fairly subtly just to add character to the sound. Make sure you experiment, and save any chains that you like to your library for future use.
Creating Unique Textures and FX using Ableton’s Warp Modes
Without using any audio effects, Ableton’s warp modes offer a lot of potential for audio sound design. From simple speeding/slowing of audio, to creating granular glitched out textures, the warp modes are a great way to quickly transform an existing sound.
Note that the techniques shown here specifically use Ableton’s warp modes. If you are not an Ableton user, you can try experimenting with the audio warping features in your DAW. Additionally, here are a few other things that you can try for manipulating audio pitch and time-stretching:
- PaulXStretch – a free VST capable of extreme audio stretching. Highly recommended, especially if you like making drawn out, ambient textures;
- Granular synths/audio effects – The techniques below that utilize the “texture” warp mode create results that sound very much like granular synthesis or processing. Check out Fruity Granulizer (FL Studio) and Alchemy (Logic Pro’s awesome sample-manipulation synthesizer);
- If none of those work for you or if you want to explore further, check out this list of 10 granulizer plugins.
I find that these techniques usually work well with drum loops, percussive sounds, and field recordings, but experimenting with melodic sounds or basses can also yield some interesting results.For this example, I am starting with a foley loop of some coins I recorded a while ago and haven’t found a good use for yet.
Since I’m going to be doing a lot of time stretching and other warping, I try to listen for portions of the sound that possess interesting textures or something else unique that might sound good when chopped up to accentuate a main drum beat.

Before moving through the warp modes, I like to experiment with the tempo of the clip to see if speeding it up or slowing it down yields anything interesting. After doubling the tempo a few times, you can scan through the audio clip to find the most interesting parts. Already, I am hearing some sections that can add glitchy character to a drum loop.

Next, I’m going to create a copy of my pitched-down loop and start experimenting with the warp modes. For this technique, I like to use the “Texture” mode, available on Ableton Live’s Warp Modes, and then experiment with the Grain Size, Flux, and Transpose. If you don’t know what these are:
- Grain Size: provides rough control over the average grain size used;
- Flux: introduces randomness into the grain size – larger values give more randomness;
- Transpose: alters the pitch of the sound, in semitones.
To get some more movement going, I’m going to use Ableton’s Clip Envelopes to automate those parameters. Here’s a full section of the loop that sounds quite interesting with some movement on those parameters.


You can continue this process of experimenting with warp modes and envelope automation until you have some sounds that you are happy with. For now, I am going to listen through my loop and pick out the best portions of the sound that will make for good glitchy percussive fills.

Now, I have a set of new, original samples that I can save for later use. To take these samples further, I could start running them through various effects chains, or resampling them further. I like to experiment with delay plugins to add some more life to the sounds.
As a quick example, here’s how these sounds can sit with a basic loop. Note that the samples are still quite dry as no additional processing has been added here.

Creating Unlikely Juxtapositions with ‘Kitchen Sink’ Loops
This final technique is one that I use in a lot of my songs. Rather than being a “sound design” technique as the examples above, I consider this more of a songwriting technique.
The general idea is to go through your sample library semi-randomly and without thinking too much, grab anything that sounds good. The sounds can be in different keys, at different tempos, and altogether completely different. The goal is just to find a lot of sounds that you might find interesting in the present moment.
Before grabbing my sounds, I like to throw down a basic drum beat. This will give me something to chop my sounds around. Here’s what I have to start with.

Next, I am going to start flipping through my library. I recently re-organized all of my samples to group together sounds with similar functions. This makes it easier for me to use this method, since I can go to my “SYNTHS/MELODIC” folder and start flipping through sounds.

I’m going to randomly click through my Loops and One Shots folders and anytime I find a sound that I like, I’ll drag it onto a new track. Here’s the result of clicking through for about 2 minutes.

Now that I have a bunch of raw audio to work with, I’m going to flip through my sounds again and start chopping out the bits I like and placing them in my loop. One important concept to keep in mind is that it is okay to delete things.
As producers, we sometimes get very tied to any committed ideas, and it can be difficult to change or delete sounds. Getting over this mindset will help you get unstuck when a track starts to feel stagnant, and encourage you to remove sounds that don’t feel right without dwelling on your decision. I find that building up a large loop and then deleting anything that does not fit is often what helps me turn a loop into a more cohesive arrangement.
With that said, this is a great exercise for getting comfortable with deleting sounds. Don’t feel tied to anything – simply pick sounds that you like and start trying to build a groove around your drum beat. Note that at this stage, I will usually pick a key and start tuning my samples to that key as I manipulate them.
Now, I’m going to pick a key somewhat arbitrarily (Eb here because I like writing in Eb) and I’ll get to chopping. After a few more minutes, I’ve ended up with this loop.

I like where it is headed, but the high mids and highs are feeling a little too crowded. I’m going to delete the bell loop, and duplicate the length of my loop so I have some more room to add variation and subtract some of the current sounds. I’m also going to start deleting bits from some of the sounds that are currently a bit too lengthy.
By chopping the samples up rhythmically, I’ll start to build a more interesting groove. For a simpler track, you might not need to spend much time in the chopping stage, but as I am going for a glitchier tune with sharper cuts, I’m going to continue chopping and deleting liberally.
Once I’m happy with the main sounds, I’m going to group all of my samples and route my kick and snare sidechain so that the whole group bounces just a little bit with the drums. I am also going to add a bit of reverb to the group and pan some sounds in pairs so that the mix feels balanced in the stereo field.

This loop is coming together now, but still feels a little too busy for me so I’m going to chop away a bit more and automate the reverb on the group.

There you have it! I started this session with no real ideas, and by simply chopping up and tuning some samples from my library, I now have a pretty decent starting point for a track.
If you get to this stage and you can see the potential for a full track, you can start outlining a basic arrangement and then adding transitions, doing further subtractive arrangement and adding some bass parts.
If you like the loop but you still aren’t feeling what you have, resample the entire “Samples” group, and save your new sample labeled with key and bpm. Now your library has one more really unique entry to start with the next time you want to start a track or build another “Kitchen Sink” loop.
WOW. I WANT TO HEAR FROM YOU NOW
I’m simply blown away from these techniques that Jacob showed us. Wow. I think the third technique is the one I’ll try first!
Which one of these three techniques will you try first?
Let us know in the comments below:
Liked this Post?
Subscribe to our Weekly Newsletter for more
