Today, we’re going to talk about the top 10 mixing tips I’d give to anyone in the music industry.
In this post, you’ll learn the mixing tips I wish I knew when I started producing. Some I’ve discovered 5 years after starting to produce, and some I’ve only recently learned after 7 years of mixing tracks.
From these tips, you’ll be able to understand DOs and DON’Ts that you may make or avoid because of something you learned online, without fully understanding why you’re even doing it. In addition, you’ll be able to break some fixed mixing rules you’ve learned online that may be holding your mixing back.
You can also check our Top 10 Mastering Tips over here.

Therefore, I highly recommend you check out these 10 tips since they will help you streamline your process and avoid possible mistakes in your mixing process. Here’s what we’ll talk about today:
- There Are No Fixed Rules
- Your Mix STARTS With Volume Knobs
- Referencing is KEY
- Using EQ Matching as a Mixing Guide
- Sidechaining Your Elements Properly
- Getting Your Low End to Sit Tight
- Don’t Make Your MIX Mono Below XXXhz
- Anchoring the Most Important Elements of Mix
- Feel Free to CUT and BOOST Your EQs
- Louder Is Not Always Better
Let’s dive right in!
There Are No Fixed Rules
As with anything in music, there are no fixed rules. Despite what many people say, you don’t need to:
- Set your kick to -6db and mix from there;
- Stem out your track and mix in a different project (even though that’s how I do it);
- Test your song on crappy speakers, as MANY say;
- Parallel compress vocals or your mastering chain;
- Low Cut all tracks except your kick and bass;
The rule is simple… There are no rules.

Because there are no rules, it’s important to mention that what has worked for one track may not work for another track. Therefore, it’s important to understand the concept of the techniques I’ll give you today, and understand when you should apply them.
For example, although I’ve explained my vocal mixing chain in this post, when I simply copied and pasted my vocal rack from ‘Find My Own’ to ‘Take Me Away’, the rack simply didn’t work because they have two different vocals. The concept of the rack is the same, but the way it is being applied is different!
It is important to make sure that EVERYTHING I teach you on this website is just a technique that can be applied to your specific scenario, and the only way you’ll know if it works or not is by testing it. Once you’ve tested it, and understand why it worked/didn’t work, then you’ll be able to reapply it in a different scenario.
Your Mix STARTS With Volume Knobs
Before you add ANY plugin to your mix, just use volume faders and you’ll be impressed with the quality of the mix you can get. With the help of a reference track or even your own tracks as reference tracks, start moving faders only until you reach a point in the mix where you like what you’re listening to.
As a workflow tip, when starting your mix, listen and completely focus on your track. Write down a list of elements you think could be louder or quieter from this first listen and go make these adjustments.
It’s tempting to use plugins, I know… it’s tempting even to write down what plugins to use, but avoid this at the first stage. By adjusting only the faders, you’re going to detect a couple things:
- What is the key frequency that I’m looking to raise with that fader? For example, when boosting/lowering a kick, you may want to raise the attack or the oomph (low end) of it.
- Elements that need to be later EQed since raising them entirely caused something to be too loud/quiet.
- When boosting a kick, you might have done this to boost the oomph, but this caused the attack to be too loud.
- When raising the volume of your chords, some low end rumble might have come with it. So, you need to later use an EQ to low cut this.

After this initial step, write everything that you feel needs to be fixed due to volume fader adjustment, but start your mix with faders. Only by starting with faders will you know what you need to correct later with EQs and any VST since you started with the balance of the mix first.
Referencing is KEY
There’s a lot of information that you can get from referencing, and one important one is mixing. Volume, character, compression, loudness… you can extract all these elements and many more from tracks you like by referencing tracks properly.
To give an example, you can identify the levels at which some elements of the track are playing. To do this, do the following:
- Pick one or two tracks and put them in channel 1 and 2 and match the reference tracks’ structure to your track, i.e; drop 1 of track one hits at the same time as drop 1 of your track. This way you can compare apples with apples. Check the example below:

- Put the tracks at a level similar to yours, but avoid metering tools and use only your ears to match the volumes;
- Pick a spectrum analyzer and compare the loudness of the kick. If your reference track has its kick playing at -10db then, BAM! You already have an idea of where you should put your kick as well.
This is only one example of something you can identify with referencing. By doing this, you’ll be able to balance your songs like the tracks you love and your songs could end up having a mix that is similar to your references, which I’m sure you’d love to achieve. Here’s what else you can get with referencing:
- Track structure and arrangement;
- Level difference between drops;
- Volume levels of vocals compared to the instrumental;
- Mix relationships between elements, and;
- Many others.
I use referencing for almost everything. I’m going to make a post only about referencing eventually, but you can read more about it in these posts:
EQ Matching as a Mixing Guide
EQ Matching is a tool that matches the EQ balance of your track to a reference track. The output of EQ Match tools is “Do this and your track will have the same frequency curve as your reference”.
For starters, I don’t use EQ Matching as an action taker for anything, but instead as a guide to what I need to do. The main reason why I don’t do this is because EQ Match adjustments may sound horrible, since it affects the whole master of your track. If you still have access to the mix, why not just tweak the mix directly and only tweak what needs to be tweaked?
From my experience, tweaking the mix will not only get you a cleaner result, but it will also give you more flexibility than tweaking the master entirely. That’s why I avoid using it as an action taker. For example, look at the picture below:

If this was your song, you’ll see that you need to boost your sub/second octave, cut a bit of the low mids, and boost 15khz+. Therefore, why not go into the mix and do that? This way, you’ll be getting the information from EQ Matching tools, but you’ll apply them to the specific channels (culprits) that may be causing mixing problems.
I recommend you use EQ Matching at some stages of your mix & master or creation. Whether you’re creating or mixing, here are some examples of when you can use it:
- You’re lost and don’t know what to do in your mix;
- You like the way your track sounds, but want to compare it to other tracks to make sure you’re going on the right path, either when creating or doing the final tweaks of the master;
- You love the master you’re listening to and just want to give a final check to make sure it’s all where it should be;
- You’re afraid that some part (low, mids, highs) of your mix is too high when compared to other reference tracks.
To give an actionable example for you to follow how to use it, last time I was creating a track, I was happy with what I created, but I wasn’t happy with how it sounded. I knew that all the elements were there, so I just needed to find the right balance between them. So, I picked an EQ Matching tool and this is what it showed me:

Interpreting this graph, I understood that I needed:
- More Low mids (200-600hz), which is where the mid bass would be;
- More mids (2000hz). Since I only had the mid bass playing, that was also the mid bass.
- Less highs (10k+), which could probably mean the cymbals (hit hats, rides, crashes) were too high.
So, I adjusted the midbass with the following EQ adjustment:

I didn’t adjust the highs on my bass because at 10k+, the cymbals are the probable culprits and I would adjust them after the bass. After doing the adjustments in the mid bass rechecking the EQ Match, this is what I got:

Ok, Mid bass was adjusted and I was happy with the sound, even though there are still some areas to boost. After that I would adjust the highs since something is a bit too loud at 10k+.
As said, the EQ Match is a guide to what you need to adjust against your reference, and not something you have to follow as a rule. Doing it this way, you’ll be able to leave your tracks with the same frequency response as tracks you love. The secret here is choosing the best reference and understanding which element to act on.
Sidechain Your Elements Properly
If you get your sidechain right, you not only enhance the flow of your track, but also enhance the mix as well. For example:
- You probably sidechain your bass to make room for your kick, but do you sidechain the kick to make room for the bass? If you kick is too long, you might need that;
- Do you sidechain the transient of the snare to make room for the transient of the kick? If it’s too prominent, you might benefit from that;
- Why do you sidechain the chords? Do you need it, or do you just want to do it?
- When working with vocals, do you sidechain it equally as much, more or less than chords?
These are just examples of how many other elements other than your bass are affected by sidechain.
Sidechaining is as much of a decision as any other plugin you add to your chain. Since it affects your sounds equally as much as any other plugin, you should pay attention to each instance of sidechain you add to your project.
At the same time, you have to understand the shape of your sidechain. 0 or 100% depth (dry/wet)? Smooth or tight slope? All these decisions affect how your mix will end up, so be intentional with them. Look at how I would adjust the shape and depth (dry/wet) of the sub of the following kick, for example:

A couple tips on sidechain:
- You don’t need to sidechain your chords as intense as you sidechain your bass;
- I recommend considering a sidechain on the attack of Snares, Rides and Hit Hats so they don’t click along with the Kick
- The more precise you are with your sidechain, the more volume you’ll have when mastering your track. However, being intense can lead to a robotic track, which could be your intention as it happens with Melbourne Bounce:
Get Your Low End to Sit Tight
There’s nothing more boring than a song with no low end. Get your low end to sit tight in your mix and 50% of your mix will be done. This will not fix a bad song, but it can give power to your track and make it more engaging.
Your low end is your kick and your bass and maybe some other percussions, but most likely is kick and bass. When we dive deep into bass, we have our first octave (40-80hz roughly), which is your sub, and we have the second octave (80-160hz roughly). Now, consider the elements’ level, sidechain and sound design to mix it properly.
- How loud should the sub be based on the kick’s level?
- How should you shape your sidechain (check above) based on the kick you’re using?
- Do you need to sidechain the kick as well? Probably yes if your kick is longer than 1/8th bar;
- How loud should your second octave be?
- Will you use the same sidechain settings of your sub on your second octave? Why?
These are some questions you should be asking yourself when mixing the low end and you should have the answers to all of them.
Whenever I mix the low end, I normally use a reference track and a spectrum analyzer to understand where my kick and sub’s volume will be at. After that, I look at the kick’s waveform to draw the shape of the sidechain for the sub and second octave, which normally are different in slope and dry/wet settings. If my kick is longer than 1/8th, I always sidechain it as well to make room for the sub.
If you want to go more in depth about this topic, download Abstrakt’s Low End Mixing Checklist.
Don’t Make Your MIX Mono Below XXXhz
This concept is not wrong per se, but there is a better way to do it.
First, if you see anyone saying “mono everything below 100hz”, understand that it has the right intention, but one wrong concept. My question to him would be “Why 100hz?”. What if the song had a bass progression that goes from 80 to 130hz, would only some of it be in mono?
So, I agree that you have to make up to a certain frequency mono, but it depends 100% on your chord progression, and not a set frequency. Look at the progression below:

Let’s say we have a bass progression that plays F-Ab-C-Bb. If we put this into frequencies, we have 87hz-103,8hz-130,8hz-116,5hz. If this is your scenario, then you can make everything below 135hz (4hz as a safety net) mono. However, if your progression plays 2 semitones up, like the one below, your highest note would be 146,8hz (D) as you can see:

This would require you to mono everything below 150hz and not 135hz as we did previously. As I was saying, it all depends on your progression
The second reason why you shouldn’t make your full mix mono below XXXhz is because why not put the specific channels that have content below XXXhz directly in mono right from the mix? If you know that the only elements that have content below XXXhz are your kick, your bass and possibly your second octave, why not make these elements mono directly on their channels?
Therefore, make sure to make your low end mono since this will help your song, but don’t do it on your master. Do it directly in your mix and to the elements that need this done.
Anchor the Most Important Element of Your Mix
The reason I love using anchor elements is that it makes certain rules like “you have to start your mix by putting your kick at -6db” more flexible. It won’t be about the volume you set your elements at, but instead about the relationship between the elements you have.
For example, let’s say your anchor is your kick. As long as you know the relationship between the kick and other elements, you can reapply what you’ve applied in previous mixes to this current track to achieve a similar result. Some relationship examples:
- Sub = kick – XXdb.
- Chords = kick – YYdb, and so on.
Even if you want to change these relationships from track to track, you can use previous settings as a starting point for your new mix, which would speed up your mixing workflow a LOT, since you won’t have to rediscover where to set your elements.
But how do you choose the anchor element? Normally, it would be the most important element of your track, which to me is your kick or bass.
Regardless of the genre of your track, if it’s electronic, there is a huge possibility it will have a kick and/or a bass. If it does, I’m sure that without them in your mix, you’ll lose a lot of energy in your track, right? Therefore, since kick and bass play such a huge role on our tracks, you could start your mix with them.

Can I anchor the chords, though? Yes, you can. You can anchor any element and place the others relative to it, but I recommend you start with the low end. The main reason is that your low end has fewer elements than your highs or mids, which will make the anchoring process much quicker and easier.
By doing this, you’ll be able to speed up your workflow by having to make fewer mixing decisions and relying on relationships that you’ve used in the past. In addition to being a timesaver, it will create a cohesive mix identity to you and your tracks since they will have a similar frequency balance.
Feel Free to CUT and BOOST Your EQs
Everyone says “cut instead of boosting”, but I say cut as well as boost. Why can’t you boost? What is the problem with that? Supposedly, the problem is that you can end up with a sound which is saturated or has resonating frequencies. However, if you cut, you could end up with a sound that is dull.
As with any cut/boost, you need to have a purpose for why you’re doing this. For example, in my track Stay With Me, my bass processing ended up like this:

The Decapitator is saturating the sound, twice, which boosts some frequencies, and the EQ says for itself how much I don’t care about this “don’t boost, cut” rule, and why you shouldn’t as well. The reason I did this is because when I sent this track to my friend Apollo Nash, he said that it was lacking “edge” and “grit” in this bass. So, that’s what I did.
If you have a reason for what you’re doing, feel free to do it. Of course, you need to be aware of the problems that you’re creating and understand the right signal chain, so these boosts/cuts don’t cause you any other problems. However, if you do it and it sounds nice, even when you EQ Match it, go for it!
Leo, but can this affect the phase of an element? Yeah, it can, but should you be worried about this? If you want to learn more about phasing, check this in-depth tutorial on it.
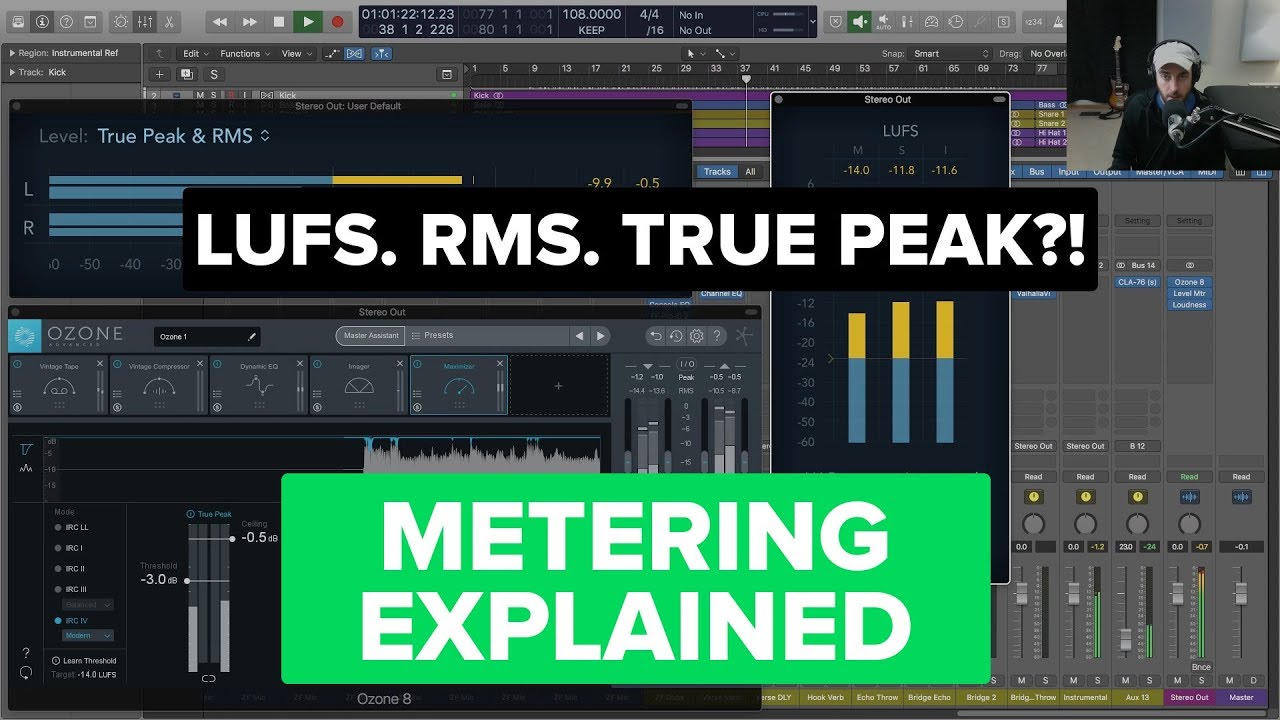
Louder Is Not Always Better
The loudness war got a break since major platforms started to normalize the loudness in LUFS. However, there is a huge understanding gap between Level and Loudness, and here is where the confusion lies.
Level is an objective electrical measurement (SPL, RMS) while Loudness is a perceptual and subjective measurement that varies according to many aspects. Tracks with similar levels may have different loudness and this relies a lot on the way they were both mixed. Check the video below to understand this difference even further:
Therefore, the misconception starts when you can’t get your song as loud as other tracks (LUFS) even though your track’s levels are as high as the other tracks (RMS). This happens normally because your mix has more elements being counted as levels (RMS) that might not be perceived as loudness (LUFS), which would make your mix higher in levels, but not as loud as others.
Here are some example of things that could be making your levels higher:
- Not sidechaining your kick and bass correctly;
- Not low cutting elements that don’t have any audible element in the low end;
- Not high cutting elements that don’t have any audible element in the high end;
- Kick is too loud;
- Sub is too loud;
- Below 30hz frequencies are too prominent;

Therefore, this misconception starts with a poor mix. When you don’t correct “problems” in your mix, for example, in your low end, you won’t be able to push your track as loud as if these problems were corrected, and these problems add up. The more you have, the less loudness you’ll have.
In other words, a bad version of a mix, therefore, could have the same level as a good version of a mix, but with totally different loudness.
I Want to Hear From You Now!
And that’s it!
These are the top 10 mixing tips that would have made my mixing life so easier if I knew them before I learned the hard way. If you want to read more about it, you can check this post about my top 6 mixing and mastering practices, or this post about my mix and master workflow.
Now I’d like to hear what you have to say:
Which of these tips will you try on your next mix?
Let me know in the comments below!
